If you would like to add an authorized contact to your account, you can do so in the Account Preferences section. It is crucial to keep authorized contacts up to date so our teams know who to contact for various aspects of your VoIP business phone solution.
How to Add Authorized Contacts in Sonar
You must be an Office Manager in Manage Organization to access Account Preferences.
- Log in to Sonar with Office Manager credentials.
- At the top of the page (in Manage Organization), click Account Preferences.

- Reauthenticate your credentials to access the Admin portal, and click Log In.

- Click the Authorized Contacts tab.
- Click Request Access.

- Fill out the form with the information in the blue call-out below these instructions.
- When you're ready, click the Submit button at the bottom of the form.
Authorized Contact Form
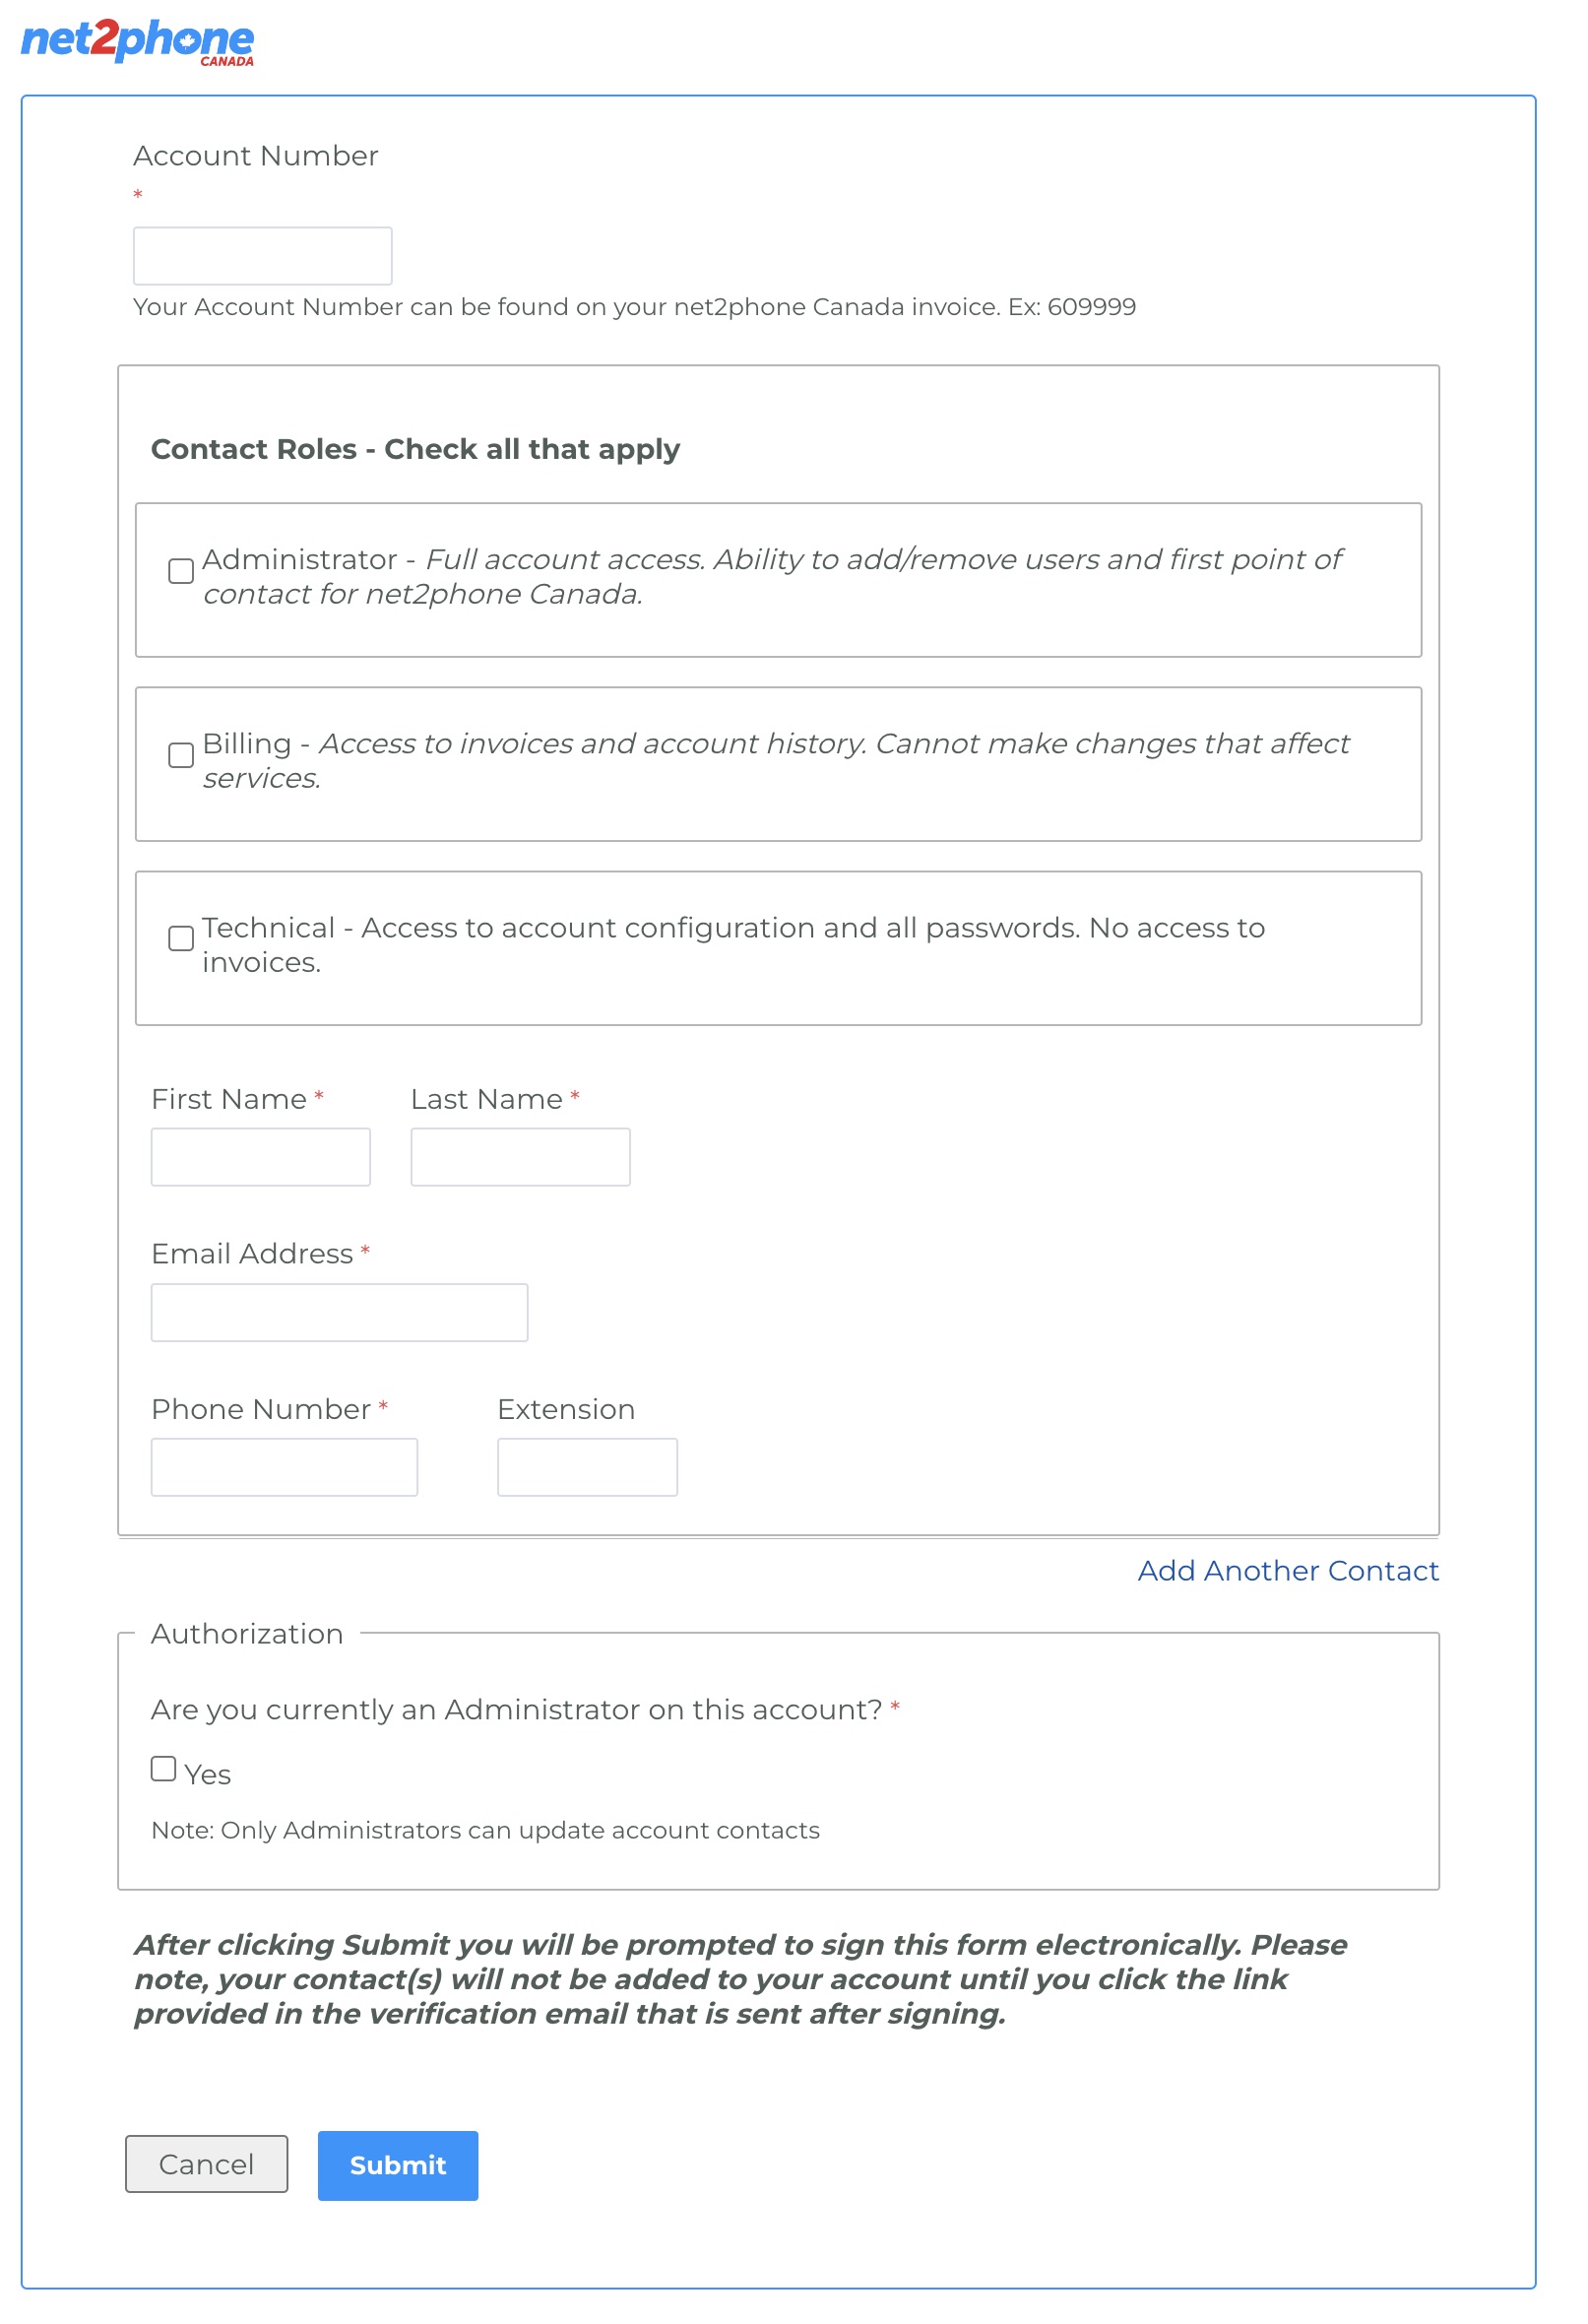
Follow the steps and fill out this form with the new contact's information and your 6-digit account number (******).
Choose a contact type (you may select multiple).
Administrator - Full account access. Ability to add/remove users and first point of contact for net2phone Canada.
Billing - Access to invoices and account history. They cannot make changes that affect services.
Technical - Access to account configuration and all passwords. No access to invoices.
Select permissions
Choose the appropriate permission boxes for what the contact is authorized to do.
Sign and submit
Sign the form and submit it.
Verify via email
Look for an email from "E-signature notifications" and click the verification link in the email to confirm.
If the request isn't verified, or the verification comes from an email that isn't already an admin contact, the request will be closed as incomplete.
New Contact Confirmation
We'll get back to you within 1-2 business days to confirm the contact has been added.


