The net2phone Canada Google Sheets™ add-on helps you import, visualize, and report on your personal or company-wide call data, offering actionable insights into call history and handling processes. Follow this step-by-step guide to download and set up the add-on.
Step 1: Install the net2phone Canada Google Sheets™ Add-on
The net2phone Canada Google Sheets™ integration still uses Versature branding.
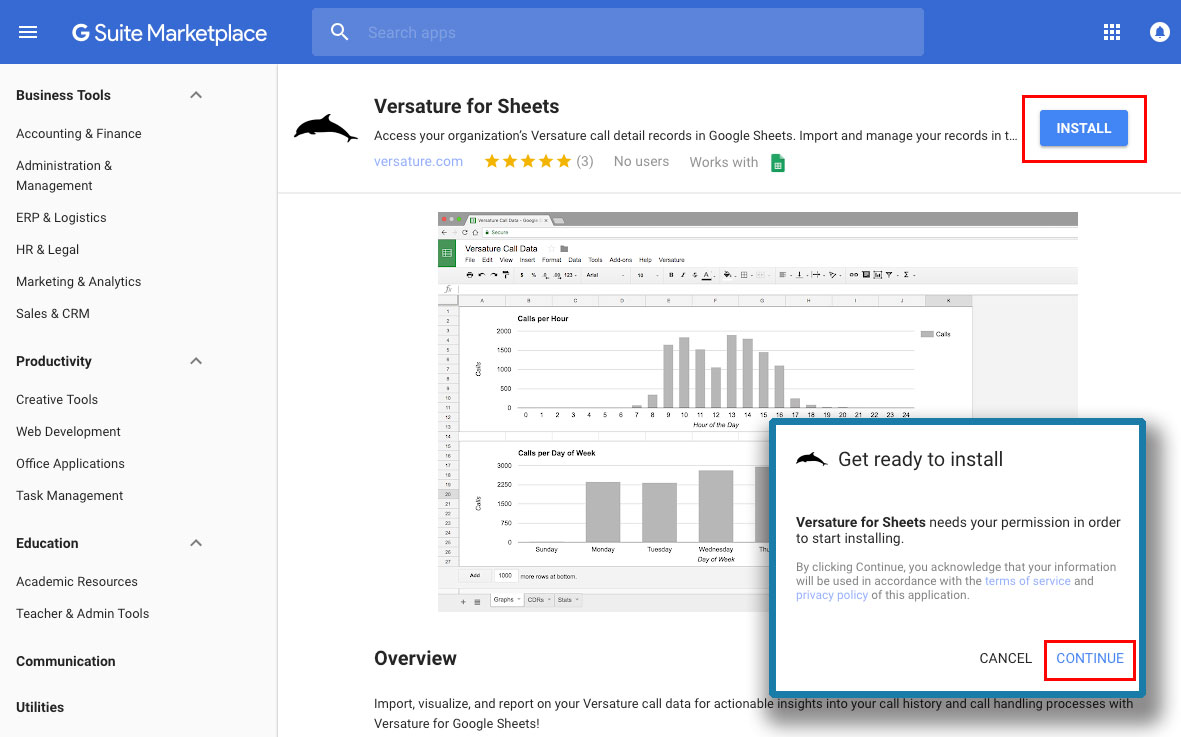
- Go to the G Suite Marketplace listing for the net2phone Canada for Sheets add-on.
- Click Install and grant permissions.

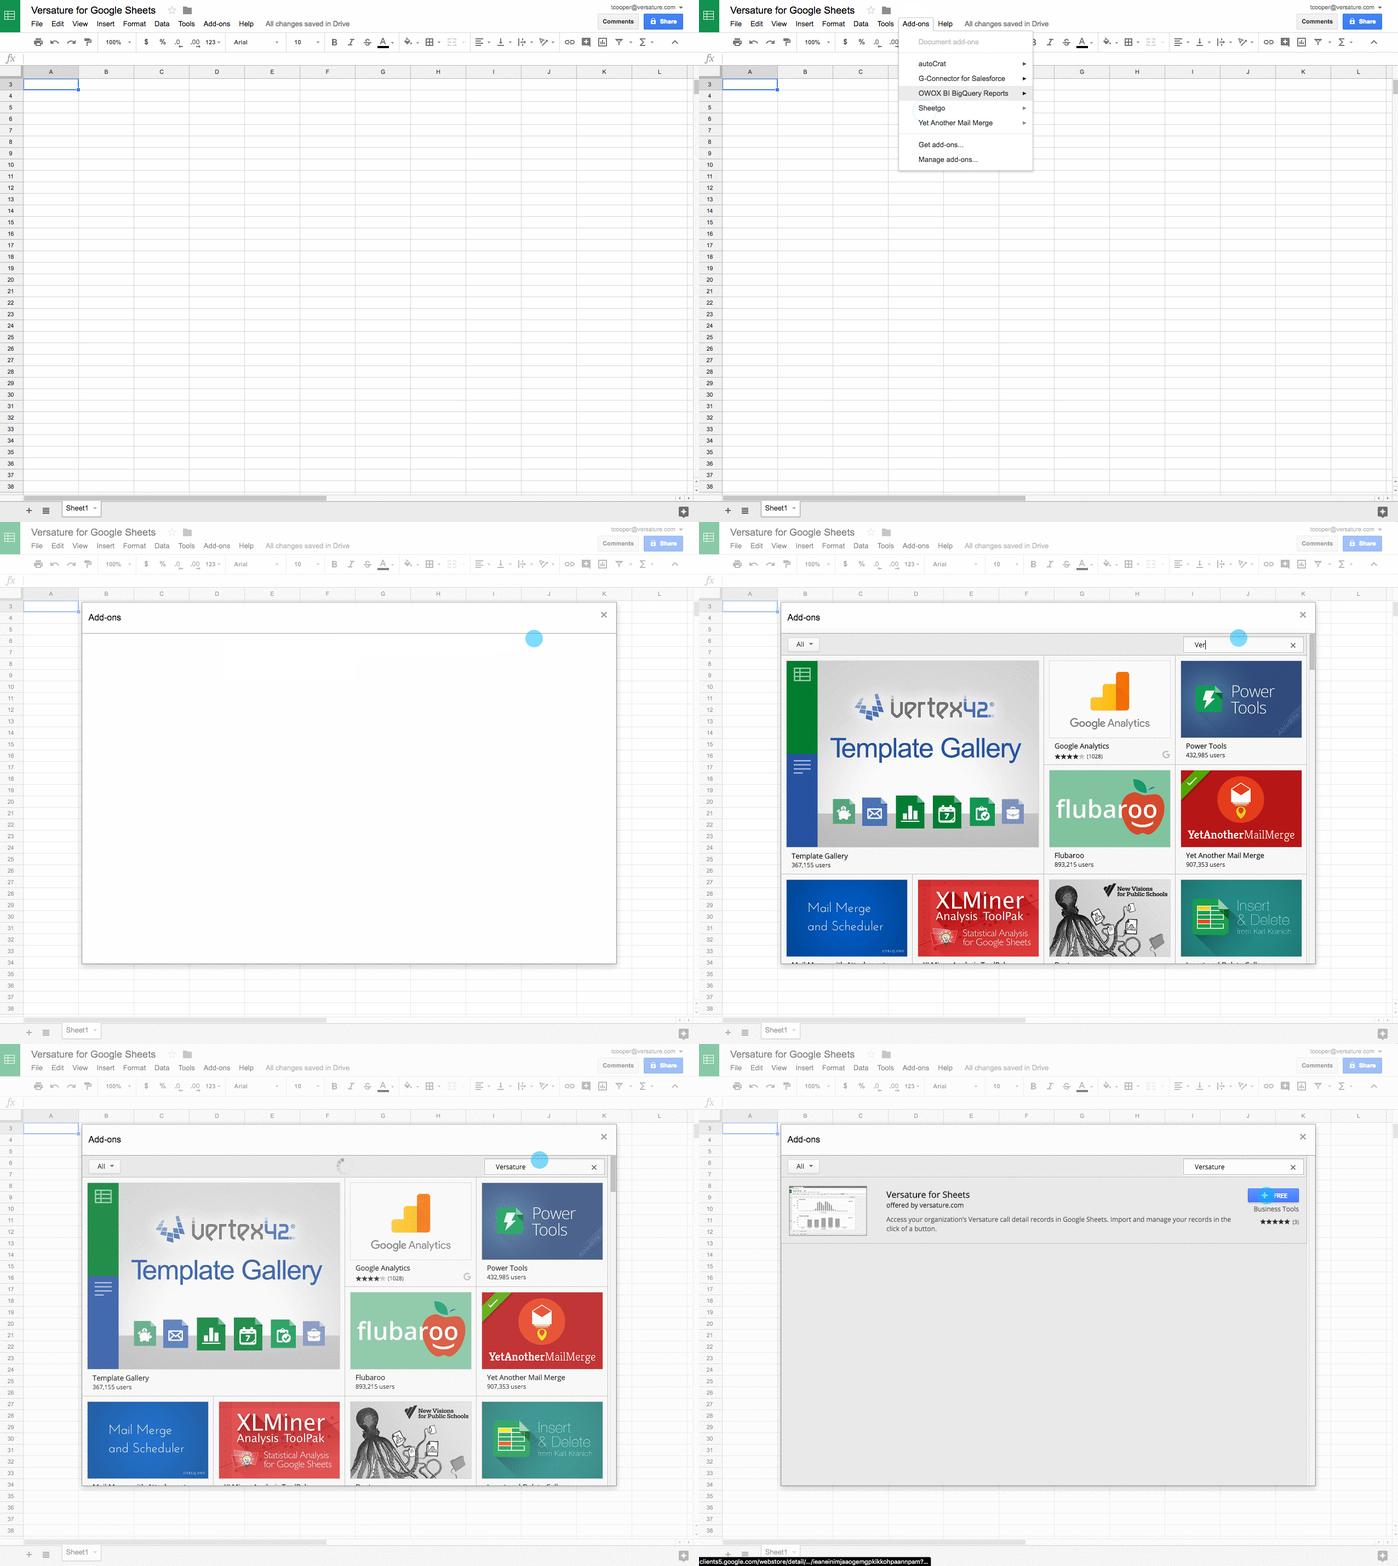
Alternatively, you can find the Versature add-on from a Google Sheets™ page.
- Open a new Google Sheet™.
- Click Add-ons.
- Click Get Add-ons.
- Search for “net2phone Canada" or "Versature."
- Click the + Free button to install the add-on.

Step 2: Grant Permissions
Click Allow as per the pop-up windows to allow net2phone Canada for Google Sheets™ permission to run, view, and manage your spreadsheets in Google Drive, view and manage data associated with the application, and connect to an external service.

Step 3: Authenticate the App
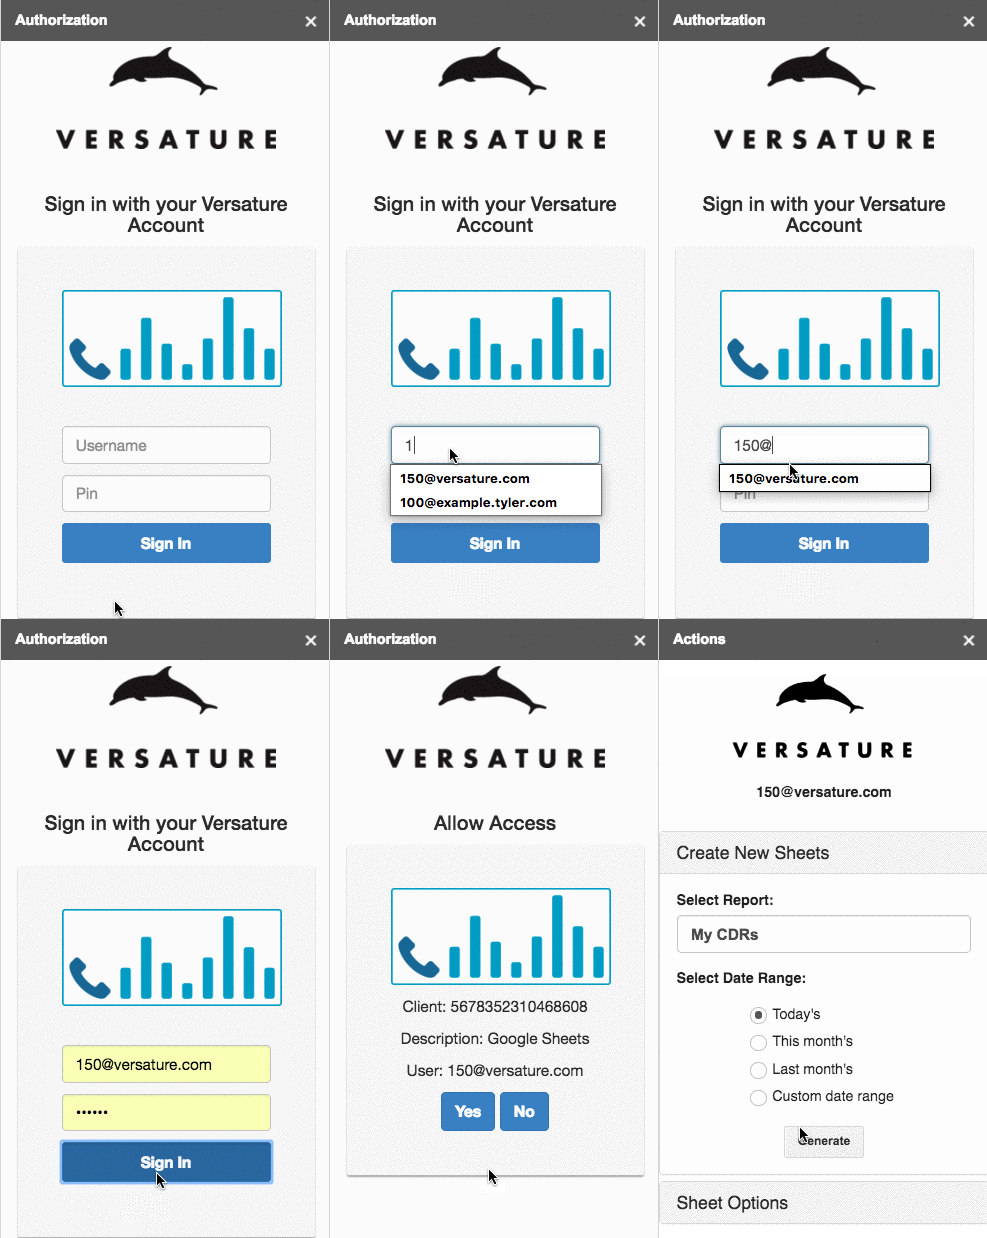
- Go to Add-ons > net2phone Canada for Sheets > Open.
- Sign in with your net2phone Canada credentials.
- Click Yes to grant access.

Step 4: Create a New Google Sheet™
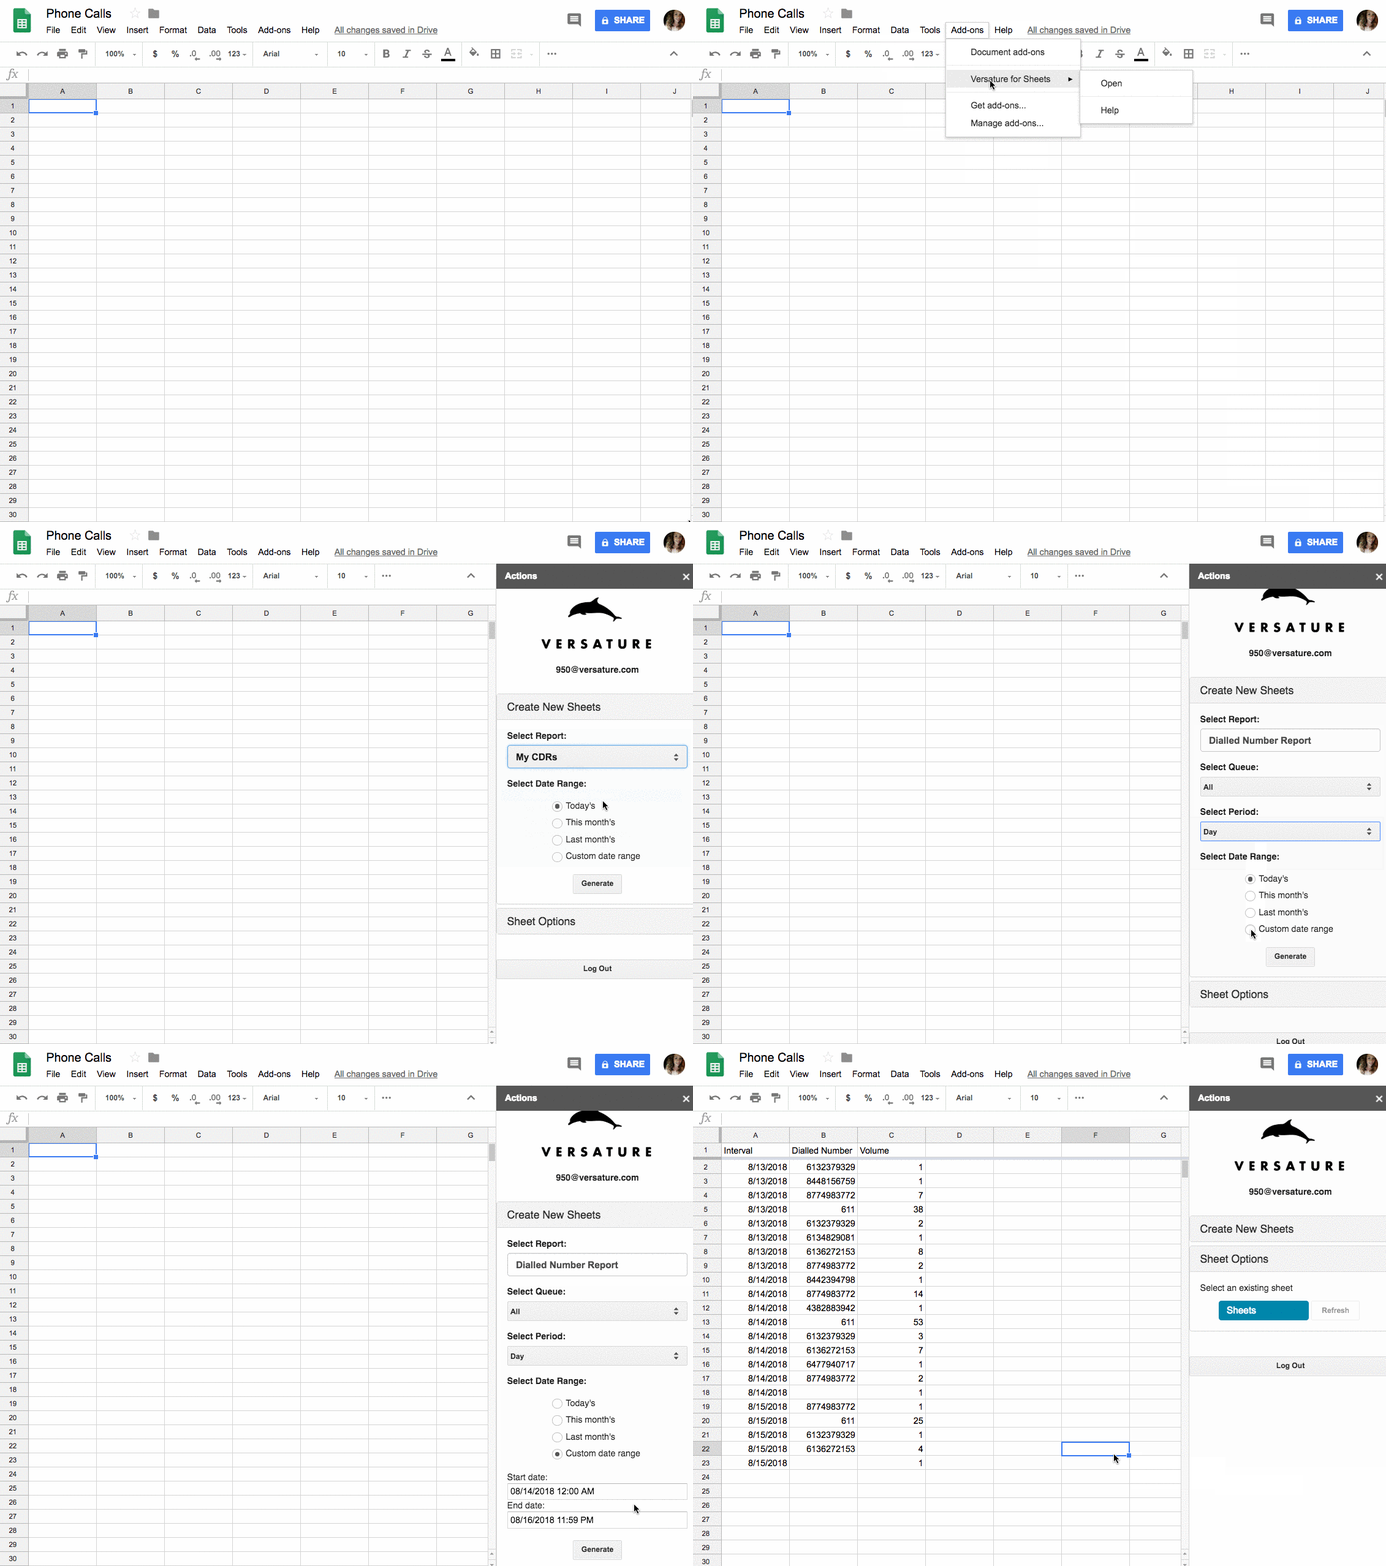
- Select a pre-built report type and date range.
- In the top menu bar, go to Add-ons > net2phone Canada for Sheets > Open.
- Adjust the report parameters in the pop-up menu to view the desired data.
Choose a pre-built report type and a date range, and then generate a new Google Sheet™.
- In the top menu bar, click Add-ons
- Click net2phone Canada for Sheets.
- Click Open.
- In the pop-up menu on the right, adjust the requirements to show the data you want to view.

