With net2phone Canada’s Salesforce integration, your organization can quickly and easily update Salesforce records in just a few clicks.
Salesforce Lightening Integration Key Features
Boost productivity and provides enhanced visibility into the status of opportunities and support calls.
Stay Informed
Always know the status of an opportunity.
Save Time
Inbound callers’ Salesforce records are automatically displayed on your screen.
Track Important Details
Rich call records are automatically integrated into Salesforce, ensuring your team always has access to up-to-date information.
Capture Accurate Metrics
Maintain accurate records, allowing you to trust the metrics critical to your business.
Customize Call Activities
Tailor the call results to match your business needs by customizing call activities.
If you are using Salesforce Classic,
Step 1: Install the net2phone Canada Salesforce Integration
While net2phone Canada is updating the Salesforce app to remove old "Versature" branding, our Sonar integration will be delisted from the Salesforce Exchange Store.
You must use this direct link to complete the installation process.
All integrations with Versature branding will continue to work seamlessly with net2phone Canada systems.
Step 2: Configure the net2phone Canada App
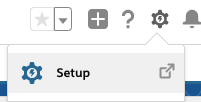
You must navigate to the Setup section of your Salesforce instance.
- Click the gear icon in the top-right corner, then click Setup.
- In the Quick Find search bar, type Call.
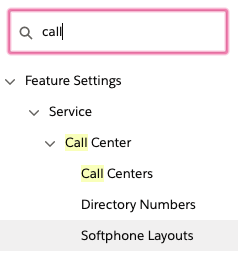
- Click the Softphone Layouts tab on the left side.
- Click New to create a new layout.

- Name the layout and check the Default Layout box.
- Click Save.

Step 3: Add Users to the Call Center
You must add users for Call Center agents.
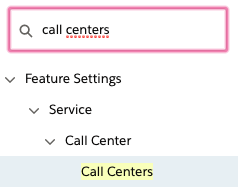
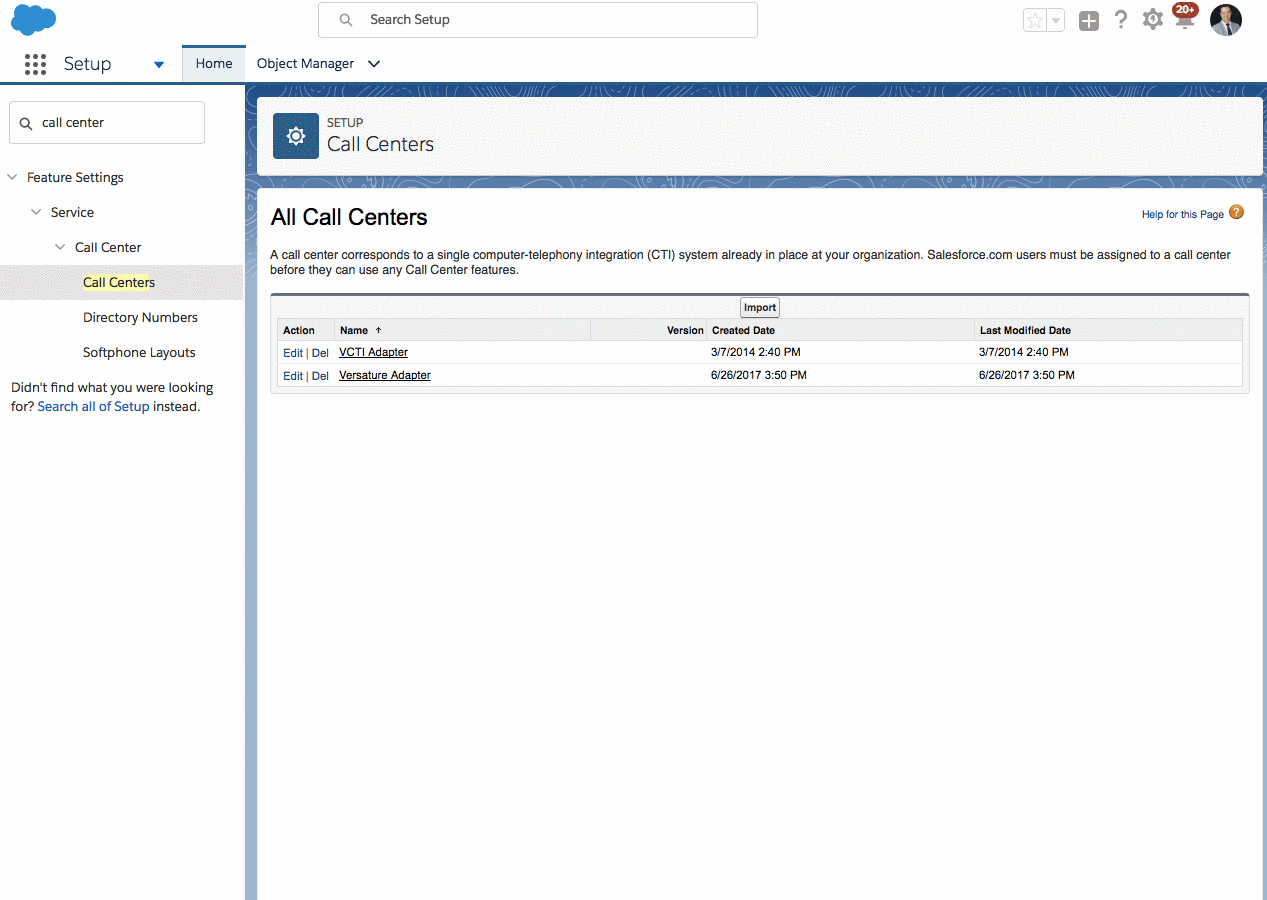
- Type "Call Centers" in the Quick Find search tool.
- Click the Call Centers tab.
- Click Versature Adapter.
- Click Manage Call Center Users.
- Click Add More Users.
- Click Find to bring up all available users.
- Select users by clicking the checkbox next to their names and clicking Add to Call Center.
Step 4: Add Softphone to the Utility Bar
The process below cannot only be configured with Salesforce Lightening.
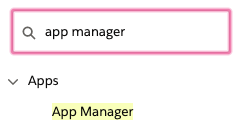
- Type "App Manager" in the Quick Find search tool.
- Click App Manager.
- Navigate to the app that needs to be edited and click the down arrow on the right side, then Edit (*Note, the app type must be “Lightning”).
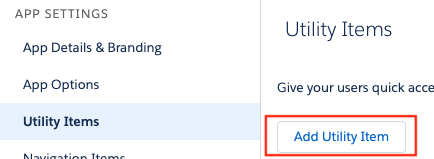
- Click the Utility Items tab at the top left.
- Click Add Utility Item.
- Select Open CTI Softphone from the list.

- Click Save.
Troubleshooting
Review some common configuration issues and our recommended troubleshooting steps to fix your issue.
Issue 1: The net2phone Canada app appears blank when opened from the Utility Bar.
If the net2phone Canada app appears blank when opened from the Utility Bar you will need to disable clickjack protection for customer Visualforce pages with headers disabled.
- Type "Health Check" in the Quick Find search tool.
- Click Health Check.
- Navigate to Clickjack protection for customer Visualforce pages with headers disabled and click on Session Settings.
- Unselect the checkbox next to Enable clickjack protection for customer Visualforce pages with headers disabled.
- Click Save.

Issue 2: Users cannot be added to the net2phone Canada Adapter Call Center because they used the app in Salesforce Classic.
If users can’t be added to the net2phone Canada Adapter Call Center because they used the net2phone Canada app in Salesforce classic, check the following:
- In the Setup menu, search "Call Centers" in the Quick Find search tool.
- Click Call Centers.
- Click VCTI Adapter.
- Click Manage Call Center Users.
- Select all the users you want to make available for the Lightning version of the app.
- Click Remove Users.
- Click OK.
- Add users to net2phone Canada Adapter call center as shown in step four of this guide.
Need Help? Contact Support!
