Use this guide to enter the correct configuration settings for the WNDR3400v3, N600, N750, and WNDR4300 routers when using net2phone Canada services. The settings have been rigorously tested in both lab and real-world environments to ensure optimal voice quality and avoid issues with non-voice traffic.
Accessing the Router Interface
Default Gateway: 192.168.1.1
To begin, connect the router to your computer, open a web browser, and enter 192.168.1.1 to access the router’s interface.
Initial Setup
Upon accessing the router, you’ll be prompted to configure the internet settings. Choose:
"No, I want to configure the Internet myself."

All the photographs used for this example are from WNDR3400v3, the process is the same for the WNDR4300 and N600/N750 models.
Step 1: Log in to the Router
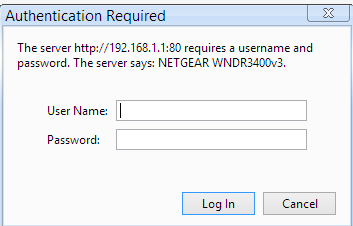
Log in using the default credentials below, or call net2phone Canada support at 611 if unsure.
Username: admin
Password: password
Step 2: Internet Setup
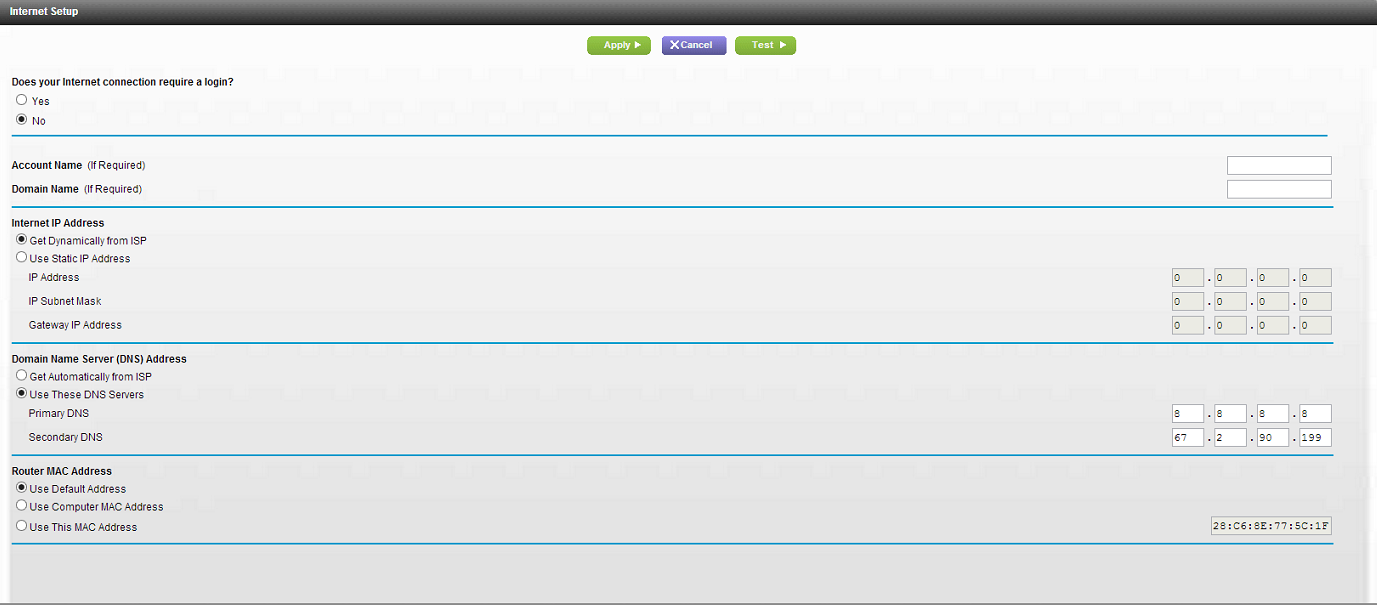
Once logged in to the router, the next step is configuring the internet setup according to your connection type for a stable network connection.
- Navigate to Advanced > Setup > Internet Setup.
- Configure the settings based on your internet connection type:
For Cable Users
- Does your Internet connection require a login?: No
- Internet IP Address: Get Dynamically from ISP
-
Domain Name Server (DNS) Address:
- Primary DNS: 8.8.8.8
- Secondary DNS: 8.8.4.4
For DSL Users
- Does your Internet connection require a login?: Yes
- ISP Login Information: Provided by your internet provider
-
Domain Name Server (DNS) Address:
- Primary DNS: 8.8.8.8
- Secondary DNS: 8.8.4.4
For Cable Users with Static IP
- Does your Internet connection require a login?: No
- Internet IP Address: Use Static IP (provided by your ISP)
- IP Subnet Mask: Provided by your ISP
- Gateway IP Address: Provided by your ISP
-
Domain Name Server (DNS) Address:
- Primary DNS: 8.8.8.8
- Secondary DNS: 8.8.4.4
- Once settings are entered, click Apply.
Step 3: WAN Setup
After configuring the internet setup, you'll proceed to adjust the WAN settings to ensure proper network functionality and compatibility with net2phone Canada's services.
- Click Advance > Setup > WAN Setup.
- NAT Filtering: Disable SIP ALG.
- Select Radio Button Secured.
- Check Disable SIP ALG.
- Check Respond to Ping on Internet Port.
- Click Apply when finished.

Step 4: Quality of Service (QoS) Setup
After completing the WAN setup, the next step is to configure Quality of Service (QoS) settings to prioritize voice traffic and ensure optimal call quality.
- Navigate to Advanced > Setup > QoS Setup.
- Enable the following:
-
Enable WMM (Wi-Fi Multimedia) settings
- Turn Internet Access QoS On
- Turn Bandwidth Control On
- Uplink Bandwidth: Set the maximum according to speed test results (convert upload speed to Kbps). You can use tools such as:
4. Click Apply when finished.

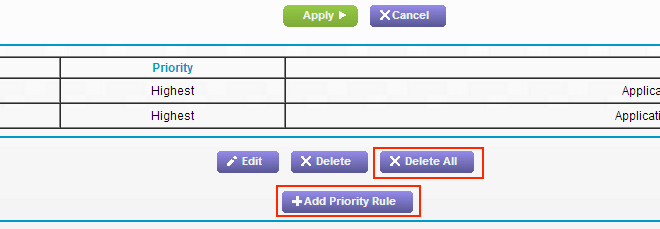
Step 5: QoS Priority Rules
With the QoS priority rules established, the next step is to set up specific QoS rules to ensure optimal handling of voice and real-time traffic.
- In the QoS Setup screen, click Setup QoS Rule.
- Delete any existing rules by clicking Delete All.
- Click Add Priority Rule to configure specific rules for SIP and RTP.
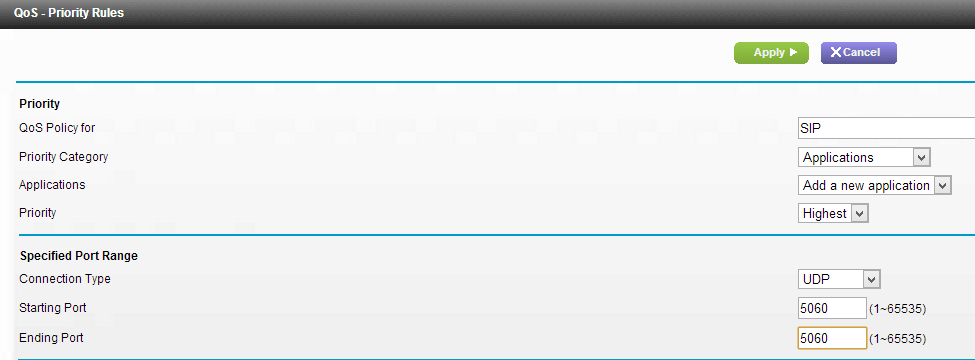
Step 6: Set Up QoS Rules
Now that the general priority rules are in place, you'll configure specific rules for SIP and RTP to enhance voice quality and call performance.
For SIP (VoIP Traffic):
- QoS Policy for: SIP
- Priority Category: Applications
- Application: Add a new application
- Priority: Highest
-
Port Range:
- Connection Type: UDP
- Starting Port: 5060
- Ending Port: 5060
Click Apply when done.
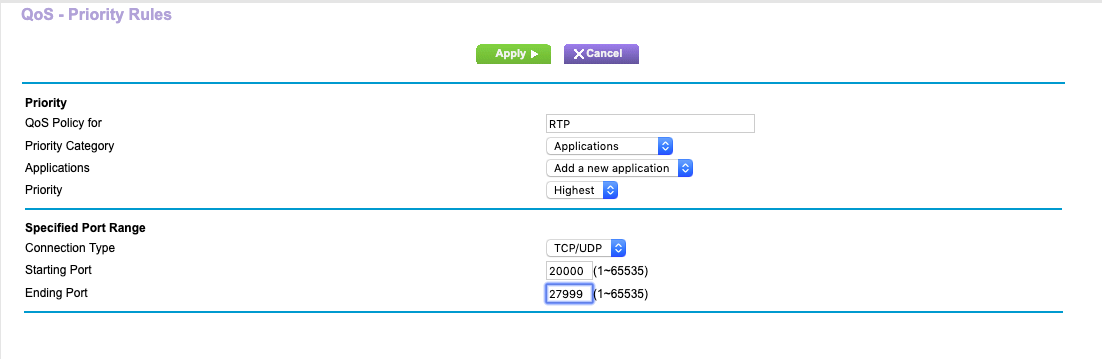
For RTP (Real-Time Protocol):
- QoS Policy for: RTP
- Priority Category: Applications
- Application: Add a new application
- Priority: Highest
-
Port Range:
- Connection Type: TCP/UDP
- Starting Port: 20000
- Ending Port: 32999
Click Apply to save your changes.