Whether you're leading a team huddle, hosting a client call, or running a recurring stand-up, Huddle gives you all the tools you need to collaborate effectively—from screen sharing and breakout rooms to moderator controls and emoji reactions.
In this article, you’ll find a detailed walkthrough of the features available during a Huddle video conference, including how to manage your audio/video settings, share content, assign moderator rights, and more.
Integrate your Calendar for Seamless Scheduling
Connecting Huddle to Your Google or Microsoft Calendar
Easily schedule virtual conferences with Huddle by integrating it with your Google or Microsoft Calendar. Follow the steps below to connect your calendar to Huddle and enjoy seamless scheduling!
How to Connect Huddle to your Business Calendar
- Log in to Huddle using your Sonar credentials.
- Click Connect Calendar button.
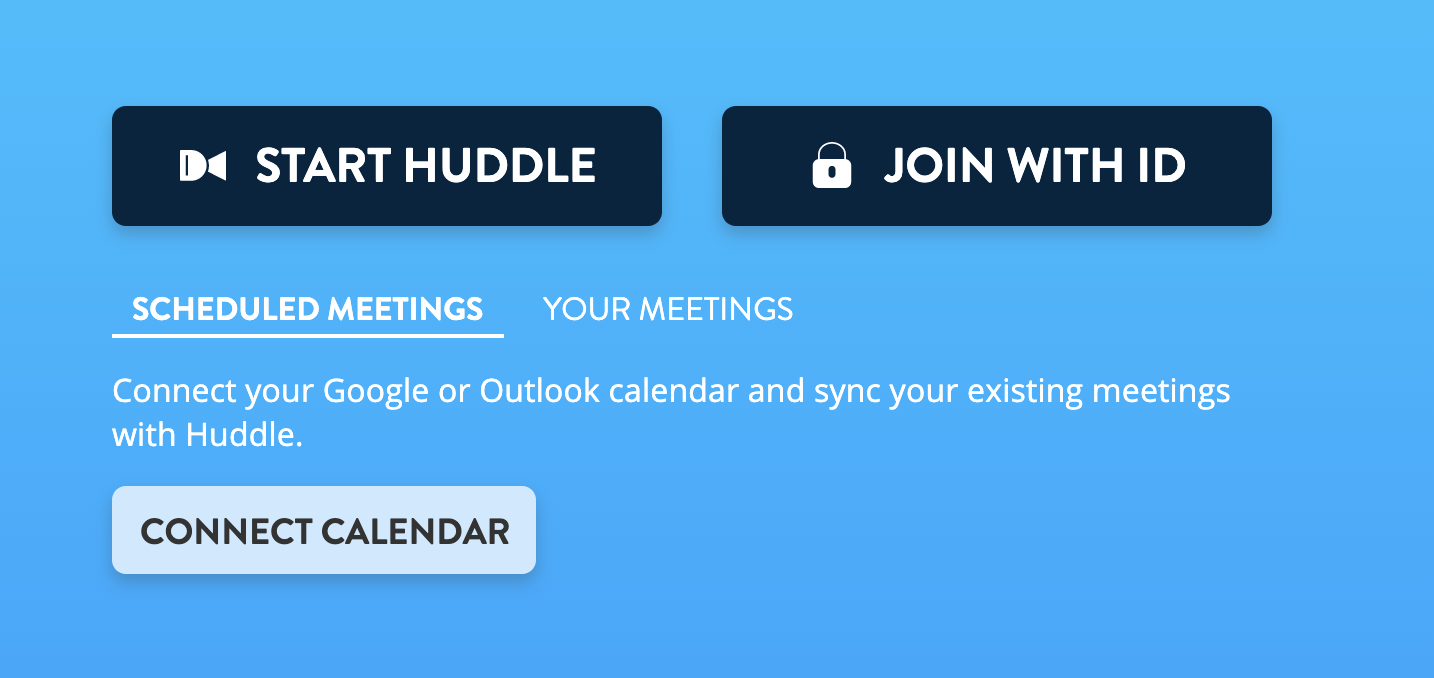
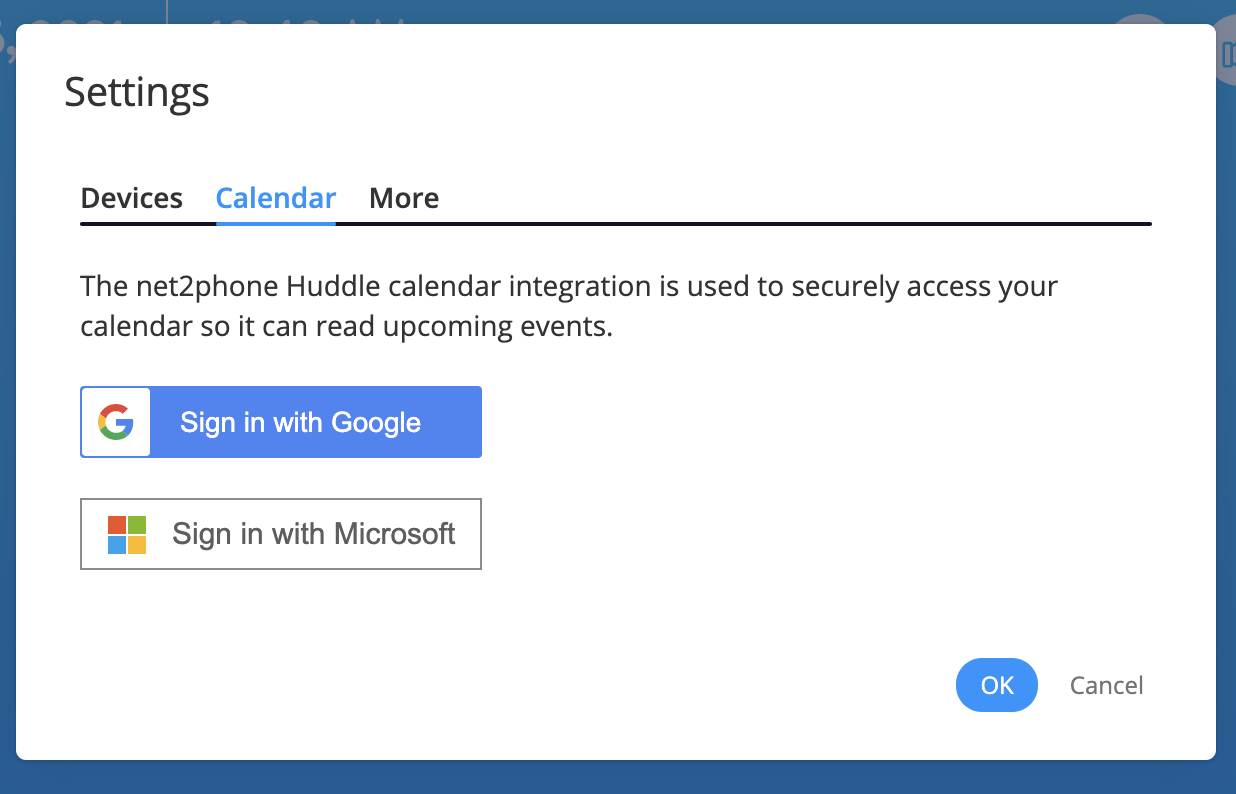
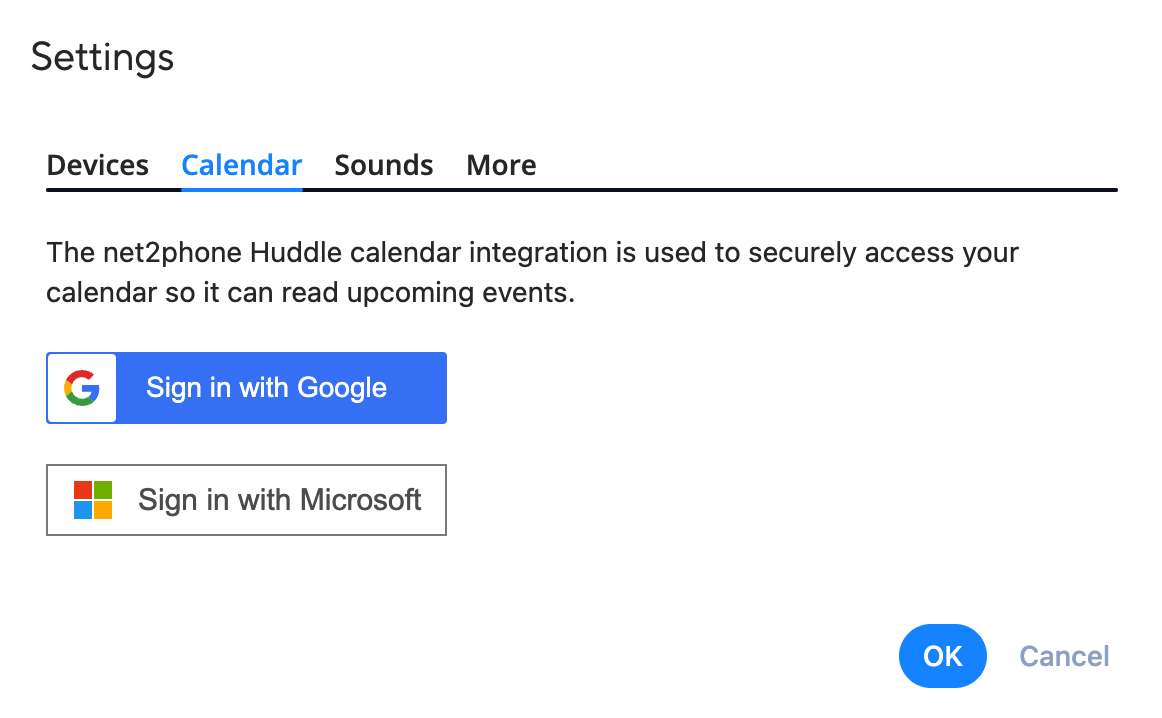
- Choose either Google or Microsoft as your calendar provider, and click Ok.
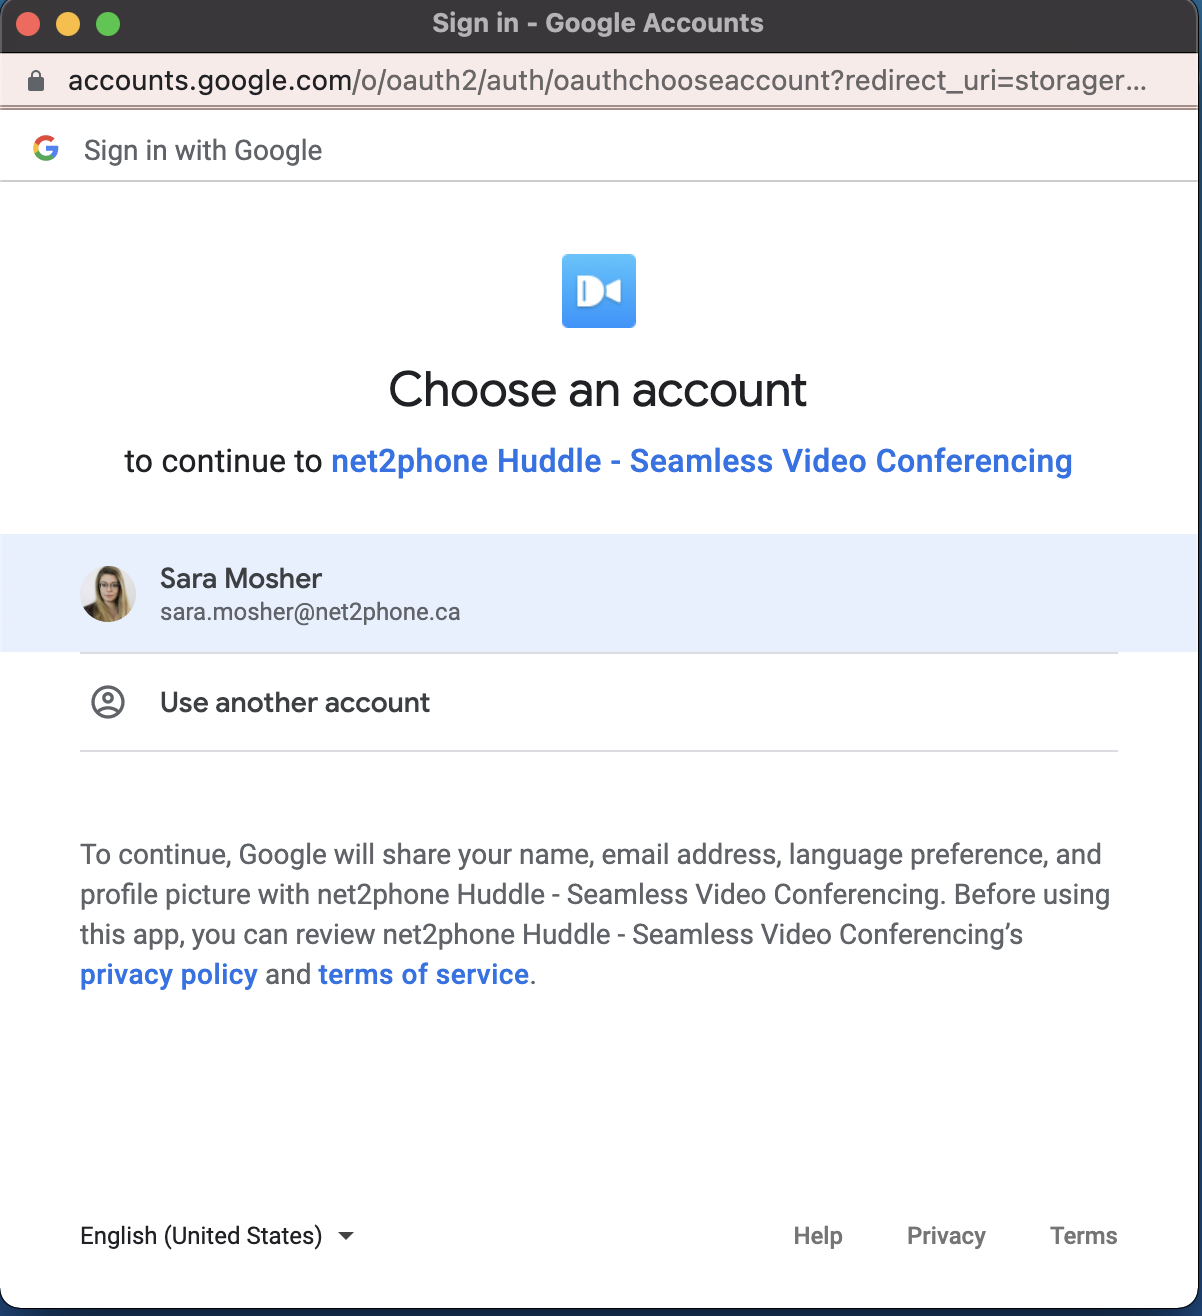
- Sign in to your Calendar app.
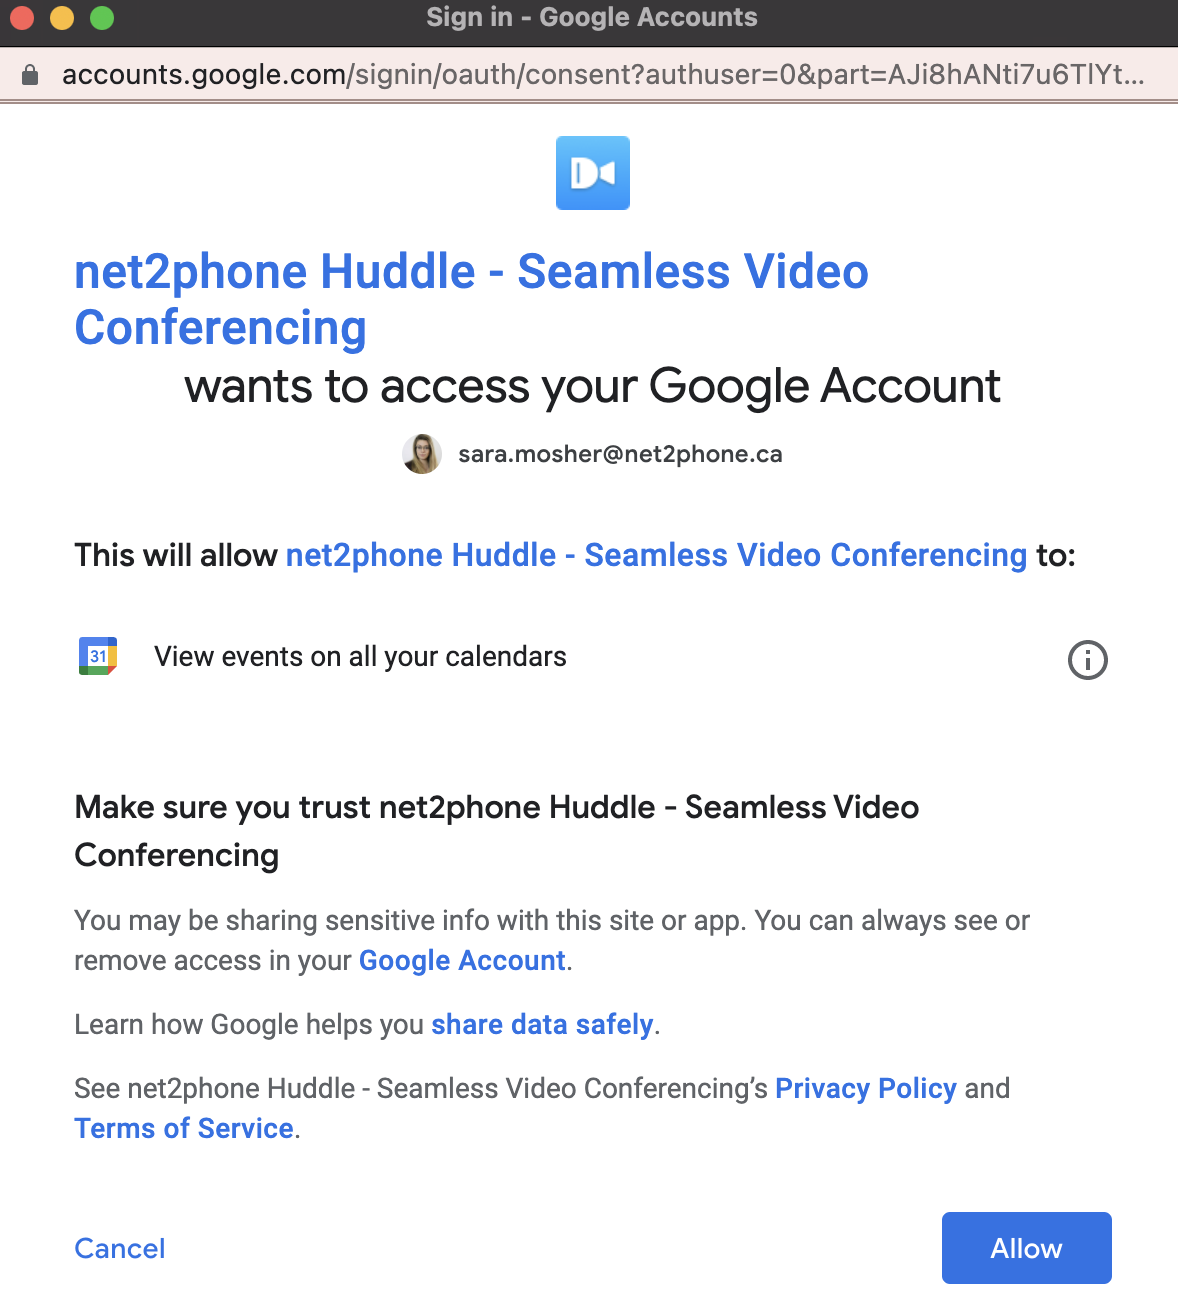
-
Allow necessary permissions, and your calendar will be synced!
Huddle Pre-Lobby Options
Preparing for a Huddle Video Conference with Pre-Lobby Settings
Virtual meeting readiness is the new standard in today’s hybrid work environment. With Huddle’s pre-lobby features, you can confidently join every digital conference fully prepared.
What are Huddle Pre-Lobby Settings?
Utilize the pre-lobby features to optimize your audio, video, and overall setup. Before entering your Huddle, you can:
Enable Microphone and Camera
Ensure your audio and video devices are active.
Select a Virtual Background
Choose between a green screen effect or a blur to maintain privacy.
Mute Notification Sounds
Silence alerts to minimize distractions during your meeting.
Change Default Language
Set your preferred language for the interface.
Set Up your Huddle Video Conference
Before entering any virtual meeting, it's essential to ensure your equipment is working properly. Follow the steps below to review all of Huddle's pre-lobby settings.
-
Click the gear icon in the pre-lobby to access the settings menu.

- In the Audio tab, test your microphone and speakers to ensure they’re functioning properly.
- In the Video tab, test your camera.
- In the Virtual Backgrounds tab, choose from a variety of images to overlay on your background.
- In the Notifications tab, you choose to play notification sounds for various in-conference settings, and choose to display chat notifications.
- In the Calendar tab, you can link your calendar to Google or Microsoft to easily track upcoming meetings.
- In the Shortcuts tab, you can enable Huddle Keyboard Shortcuts.
- In the Polls tab, you can pre-write survey polls for upcoming meetings.
- In the General tab, you can change your Hudde app language. and enable your pre-meeting screen to check your camera before entering a meeting.

Pro Tips for a Smooth Meeting Experience
By following these tips and utilizing Huddle’s pre-lobby features, you'll be fully prepared to make the most of every virtual meeting.
Test your equipment
Ensure your camera, headset, and microphone are connected and operational before joining the meeting.
Be ready to share content
If you plan to Share a YouTube Video, copy the URL and have it handy for quick access during the meeting.
Troubleshooting connectivity issues
If you’re having trouble with audio or video, double-check your browser and system settings to ensure permissions for your microphone and camera are enabled.
Keep your browser updated
For the best performance, always use the latest version of your web browser.
Start a New Huddle
Start a Huddle Video Conference
In this guide, you'll learn how to start, join, and share a Huddle video conference.
Launch the Huddle App
To get started, launch the Huddle app in your business environment or open the Huddle login page in a Chrome browser. Then, log in using your net2phone Canada Sonar Credentials.
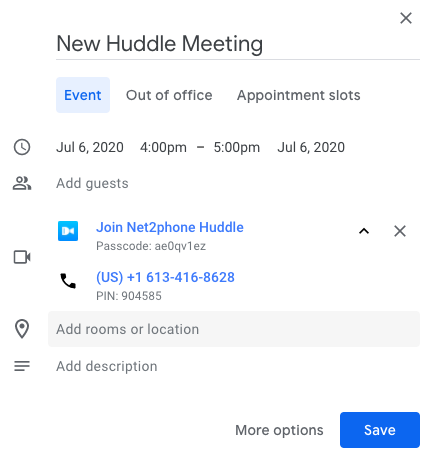
Launch from Google Calendar and Microsoft Calendar
Depending on your organization's tech stack, Huddle may be integrated with your Google Suit or Microsoft Suit. With the net2phone Huddle integration, you can schedule and launch Huddle Video Conferences directly from your business Calendar app.

Starting a New Huddle
Starting a Huddle is simple and easy to find on Huddle's homepage. You have two options for starting a new Huddle:
Option 1: Start a Huddle
Do you need to connect right away? This option launches a video conference instantly. Share the meeting details with anyone you'd like to join.
Option 2: Create a Recurring Huddle (+)
Need a regular meeting space? Click the "+" icon to start a Recurring Huddle. You and your team can rejoin it anytime, making it ideal for ongoing collaboration.

Joining an Existing Huddle
There are several ways to join an existing Huddle:
- Directly through the application
- Using a Meeting ID and Passcode
- Via Google Calendar (if the event was scheduled)
Once you've joined, you can adjust your Pre-Lobby Settings and see who else is in the waiting room.
Sharing a Huddle Video Conference
Sharing Huddle meeting details is straightforward. If you're using Google or Microsoft Calendar, participants will automatically receive their login information when you schedule the meeting.
You can invite participants, Huddle users or not, directly to non-scheduled Huddles. Simply click the Info (i) icon at the bottom left of the Huddle screen to send an email with all the necessary meeting information.

Pro Tip: Test your Huddle Invite
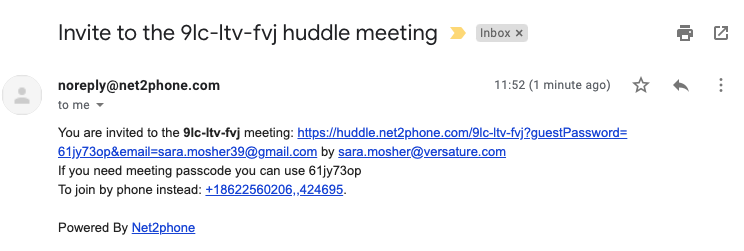
Test the invite process by emailing yourself an invitation to ensure everything works smoothly! The recipient will get all the information via email, as shown in the email below. You can test this process by emailing yourself an invite!
Huddle In-Conference Options
Huddle Video: In-Meeting Controls and Features
Lead collaborative meetings confidently and become a Huddle pro with this complete list of in-conference features.
Camera, Microphone, and End Call
In the bottom middle of your Huddle screen, you can find three buttons, from left-to-right, they are:
1. Microphone
Turn on or off your microphone, and use the circumflex button (^) to select your microphone source.
2. End Call
Leave the Huddle video conference.
3. Camera
Turn on or off your camera, and use the circumflex button (^) to select your camera source.

Grant Moderator Rights
Moderator rights enable users to mute or boot out other users and enable YouTube sharing.
How to Grant Moderator Rights During a Huddle
During a Huddle conference, the current moderators can grant moderator rights to any user.
- During a Huddle Conference, click the kebab menu (vertical dots) next to a user's name.
- Select Grant moderator.
- Confirm you want to permit moderator rights to the user.

Identify Huddle Moderators
You can check who in a Huddle video conference has Moderator Rights by the crown icon on the bottom-right of the person's user-tile.
Share Your Screen
Before sharing your screen during a Huddle meeting, you must grant screen-sharing permissions in your web browser. We recommend using Google Chrome, and this guide provides steps for setting up Chrome permissions on a MacOS.
How to Share Your Screen in Huddle
Sharing your screen during a Huddle video conference is easy. Review the steps below before your video meeting for seamless transitions between a group conversation and a presentation.
- Click the Share Screen icon located at the bottom-right corner of the meeting window.
- Choose one of the three screen-sharing options:
- Your Entire Screen: Share everything visible on your screen.
- A Browser Window: Share a specific browser window.
- A Chrome Tab: Share a single tab in Chrome.

Resetting Screen-Sharing Permissions on MacOS
If you encounter an error while trying to share your screen, resetting your Chrome permissions might resolve the issue.
- Open System Preferences on your Mac, and select Security & Privacy.
- In the sidebar, click Screen Recording.
- Uncheck Google Chrome.
- Restart Chrome, then return to System Preferences and recheck Google Chrome under Screen Recording.
- Restart Chrome again—this should fix the issue.
By ensuring the correct permissions are set up in advance, you'll avoid interruptions and ensure a smooth screen-sharing experience during your Huddle meetings.
Share YouTube Videos
Looking to captivate your audience and boost engagement during virtual meetings? Sharing a video can provide valuable context, break the monotony of long presentations, and smooth out transitions between topics. However, with hybrid work becoming the norm, even simple tasks like video sharing can feel surprisingly tricky. Luckily, Huddle makes this easier with its built-in YouTube integration.
How to Share a YouTube Video in a Huddle Conference
Sonar users can log in to the Huddle with their regular net2phone Canada Credentials.
- During your Huddle call, click the More Actions button in the bottom-right corner of the screen.
- Select Share a YouTube Video.
- Paste the URL of the video you want to share.
- Click Share.

Stop Sharing a YouTube Video
- Click the "More Actions" button in the bottom right corner.
- Click Stop Video.
- In the pop-up screen that asks if you want to stop the video, click Remove.
Huddle Quick Tips!
- Hover over the video to access YouTube controls like volume, captions, playback speed, and video quality.
- Click the video screen itself to pause or resume playback.
- Have the YouTube video URL copied and ready before your meeting for a smooth, timely start.
Use Emoji Reactions
Conference calls are an excellent way to collaborate, but contributing without interrupting the conversation can be challenging. Huddle offers emoji reactions, allowing you to express yourself without disrupting the flow. With a simple click, you can wave hello or goodbye, show support with a heart, or even add excitement with a fire emoji.
To access Huddle emoji reactions, click the smiley face icon in the bottom-right corner of your screen.

Huddle Quick Tip!
Moderators can clear emoji reactions (if they want to) during longer meetings to reset the emoji count on the bottom left side.
Huddle Breakout Rooms
Breakout rooms allow private, side conversations during a Huddle video conference. Follow these steps to create one:
How to Start a Breakout Room
There must be at least 3 participants in a Huddle meeting to create a Breakout Room.
- During a conference, click the More Options menu (three vertical dots) in the bottom-right corner of your Huddle screen.
- Select Create a Breakout Room.
- Name your breakout room.
- Select the participants you want to invite.
- Click Create Room to start the breakout session.

Huddle Chat and Polls
Enjoy the Huddle chat for both group and private messages.
To access the group chat during a Huddle, click the message icon in the top right corner.

To privately message a participant, hover over them on the right side of the page, and click the three-dot kebab menu, then click Send private message.
You can close Huddle Chat by clicking the X in the top corner, or by re-clicking the chat icon in the top right corner.

Record Huddles with Dropbox
Recording Your Huddle Video Conference Calls with Dropbox
With net2phone's Huddle video conference, you can easily record your conference calls and store them in Dropbox for later viewing. If you're new to Dropbox, sign up for a free Dropbox account here.
How to Record Your Calls in Huddle
Recording your video conference calls in Huddle is a straightforward process.
Start Recording in Huddle
- During your video conference, click the More Actions menu (three vertical dots) in the bottom-right corner.
- Select Start Recording.
Sign in to Dropbox
- A prompt will appear asking you to sign in to Dropbox. Next to Upload to Dropbox, click Sign In.
- Agree to the terms and privacy policy to continue.
- Allow net2phone Huddle access.
Begin Video and Audio Recording
After signing in, you'll be redirected back to the Huddle app. Click Start Recording to begin capturing the call.
Ending the Recording
When you’re ready to stop recording, click the Stop icon located in the top-left corner of your screen.

Accessing Your Past Huddle Recordings
To view your recorded Huddle calls, go to Dropbox and open the Recordings folder. All your meeting recordings will be saved there for easy access.
Keyboard Shortcuts
Huddle Keyboard Shortcuts
To enhance ease of use, Huddle has several helpful keyboard shortcuts.
| Huddle Action | Keyboard shortcut |
|---|---|
| Hide or show video thumbnails | f |
| Mute or unmute yourself | m |
| Stop and start your camera | v |
| Manage Video Quality | a |
| Open or Close the chat | c |
| Switch between camera and screensharing | d |
| Raise or lower your hand | r |
| View or exit full screen | s |
| Toggle tile view | w |
| Show or hide keyboard shortcuts | ? |
| Push to talk | space bar |
| Show speaker stats | t |
| Focus on your video | 0 |
| Focus on another person's video | 1-9 |
Enable Keyboard Shortcuts
You can access the list of Huddle keyboard shortcuts in the Prelobby settings. Click the gear icon next to your profile icon, and choose the Shortcuts subtab. Ensure the checkbox for Enable keyboard shortcuts.

Find Keyboard Shortcuts During a Live Conference
You can access the list during any Huddle by clicking the "More Actions" three-dot button, and then choosing View Shortcuts.

